


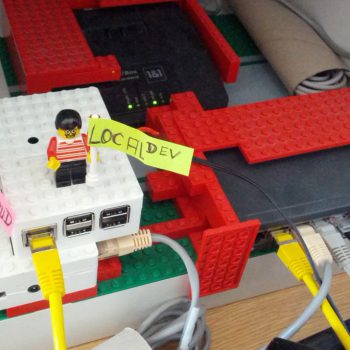
Several months ago, my girlfriend asked me about a recommendation for tablet for a low budget. She wanted to use it for office work and the common internet surfing stuff (youtube and so on). Most reviews were not good about such cheap tablets. Unfortunately, her budget was too low for an Apple iPad, Microsoft Surface 3, or Samsung Galaxy Tab. Luckily, I had a Raspberry Pi 3, an old TFT display, a mice and a keyboard in my leftovers box. It was about time to test the Raspberry Pi (Raspbian Jessie with Pixel – version 2016-09-23) as a Thin Client computer for ordinary daily tasks. The new chromium based web browser (with Adobe Flash plugin) improves the user experience for internet surfing. All video and audio player should work now. LibreOffice is pre-installed software office suite that should be appropiate to work with work with common doc and odt files (delivered from my Nextcloud instance). Well, most things of the Raspberry Pi work very nicely out of the box. Just the collaboration features were missing.
My start with personal / private clouds
For almost a year ago, I started observing Cozy Cloud for these collaboration features. Their solution seemed fine for a one user scenario. Additionally, they are in a (mid to long term) technical transition at the moment, which makes their solution pretty uninteresting for my use case. The PR and the website of ownCloud I never liked very much (too much B2B for my taste). The emerging Nextcloud initiative (originially based on ownCloud) solved that issue pretty nicely. It was about time to give Nextcloud a try. The Nextcloud server was not so difficult to install on another Raspberry Pi 3. I just followed this tutorial by Steven Seifried, which is pretty well explained for technology interested people. In contrast, the Nextcloud Desktop client on my Windows machine as well as on my Android phone has installed really smoothly without any special configuration. They run without problems yet. Only the installation for the Raspberry Pi seemed to get tricky… After some web research, I have found that helpful forum post (yes, I still use and read on forums 😉 ). The recommendation was about following the instruction based on installing the Nextcloud Desktop Client on Ubuntu. As far as my Linux knowledge goes, Ubuntu is based on Debian and the same is valid for the Raspberry Pi OS Raspbian Jessie. It was worth a try and after some failures it started to work out. This blog post describes my installation process for the Raspberry Pi 3 Jessie with Pixel.
Start with the Installation
Before you start installing additional software, please be sure that your system is up to date. Just type in these commands in your terminal:
|
1 2 3 4 |
# update system and be sure that we get everything sudo apt-get update sudo apt-get dist-upgrade sudo apt-get upgrade |
After that, we can run the exact command as described by Carsten Rieger.
|
1 2 |
# install software packages for your later compiling sudo apt-get install build-essential git cmake openssl libssl-dev sqlite3 libsqlite3-dev qt5-default libqt5webkit5-dev qttools5-dev qttools5-dev-tools python-sphinx texlive-latex-base inotify-tools qt5keychain-dev |
During the compilation, I got the error “Could NOT find Doxygen (missing: DOXYGEN_EXECUTABLE)” and some other warnings/failures with the KDE library. The KDE was not needed to fix, but the Doxygen was mandatory. Therefore, I installed it plus another additional command:
|
1 2 |
sudo apt-get install doxygen sudo apt-get install extra-cmake-modules |
Compile your own Nextcloud Client
However, after that set-up procedure, you shoud be ready for the real stuff. Please, switch to your working directory. On my Raspberry Pi it is:
|
1 |
/home/pi/ |
Get your source code from Git (see also Carsten Riegers tutorial – in deutsch) and compile it:
|
1 2 3 4 5 6 7 8 9 10 11 12 |
git clone https://github.com/nextcloud/client_theming.git cd client_theming git submodule update --init cd client git submodule update --init cd .. mkdir build-linux cd build-linux cmake -D OEM_THEME_DIR=`pwd`/../nextcloudtheme ../client sed -i 's/Icon=nextcloud/Icon=Nextcloud/g' src/gui/nextcloud.desktop sed -i 's/Icon\[\(.*\)\]=nextcloud/Icon\[\1\]=Nextcloud/g' src/gui/nextcloud.desktop sudo make && make install |
Now, you have time for a coffee. The compilation takes some time. If you run into a problem with ‘make install’ as I did after the compilation. Don’t get panic. The ‘make install‘ command tries to change some files in the /etc/ folder. It needs super powers for doing it. I solved that problem with a second try. Just type in the command with sudo:
|
1 |
sudo make install |
Most of the work is done yet. For the final process, you have to create a environment variable. This environmental variable describes the linkage to the library binary files. I prefer the nano editor for this task (I might be too stupid for the Vi editor). However, the library path depends on the used operating system.

It seems a few people have run into this not so well documented problem. Of course, the same problem emerged for the Raspbian OS. Luckily, I could find a solution myself pretty fast. The folder ‘x86_64-linux-gnu‘ did not exist in the folder ‘/usr/local/lib/‘. On the Raspbian OS it was the folder ‘arm-linux-gnueabihf‘. Please call the nano editor:
|
1 |
sudo nano /etc/environment |
And add the following line to it:
|
1 2 |
... LD_LIBRARY_PATH=$LD_LIBRARY_PATH:/usr/local/lib/arm-linux-gnueabihf |
Please reboot your system. After the restart, please open your terminal and type in ‘nextcloud‘. I am pretty curios what gonna happen on your system (you are welcome to leave a comment about your result). I hope your Nextcloud Client starts immediately and you can configure it.
Final problem solving for the Pi
Unfortunately, my system failed with the error ”nextcloud client nextcloud: error while loading shared libraries: libnextcloudsync.so.0…” That error sounds worse than it actually is. Start again your nano editor with the command:
|
1 |
sudo nano /etc/ld.so.conf.d/arm-linux-gnueabihf.conf |
and add the following line and save the changes
|
1 |
/usr/local/lib/arm-linux-gnueabihf |
For creating a waterproof linkage, please create execute this nano command and add the following line.
|
1 2 3 4 |
sudo nano /etc/ld.so.conf.d/x86_64-linux-gnu.conf #please add this line /usr/local/lib/arm-linux-gnueabihf |
Save the changes and run the final command:
|
1 |
sudo ldconfig |
Connection the client with the server
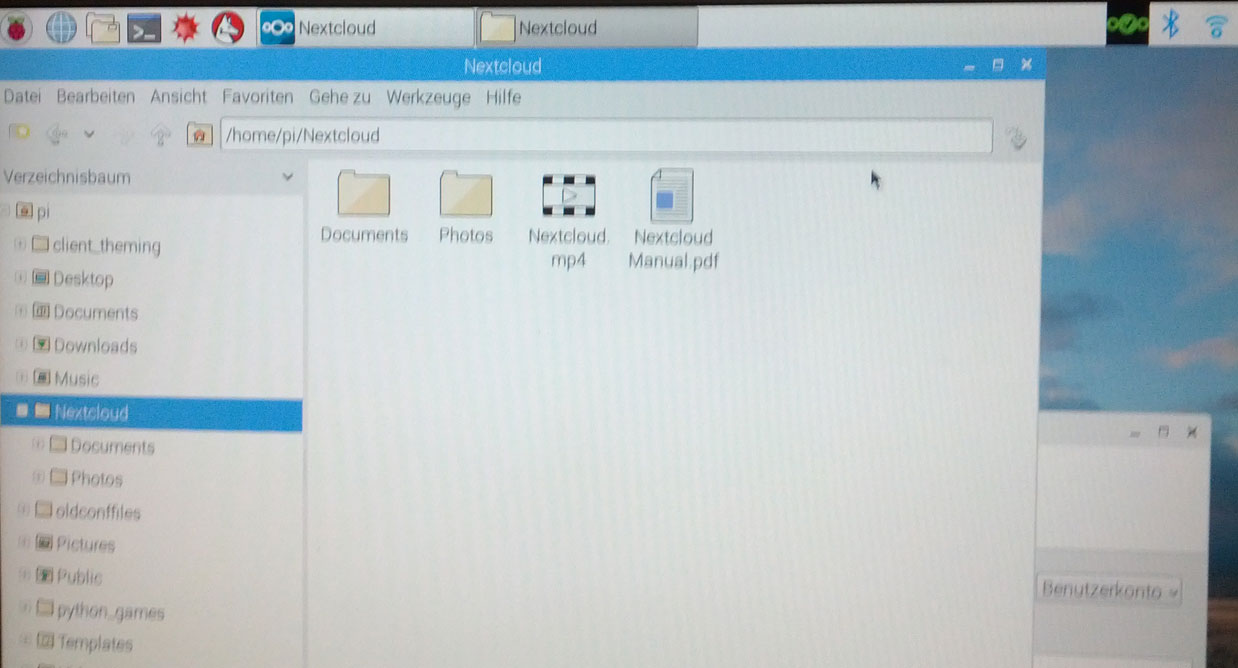
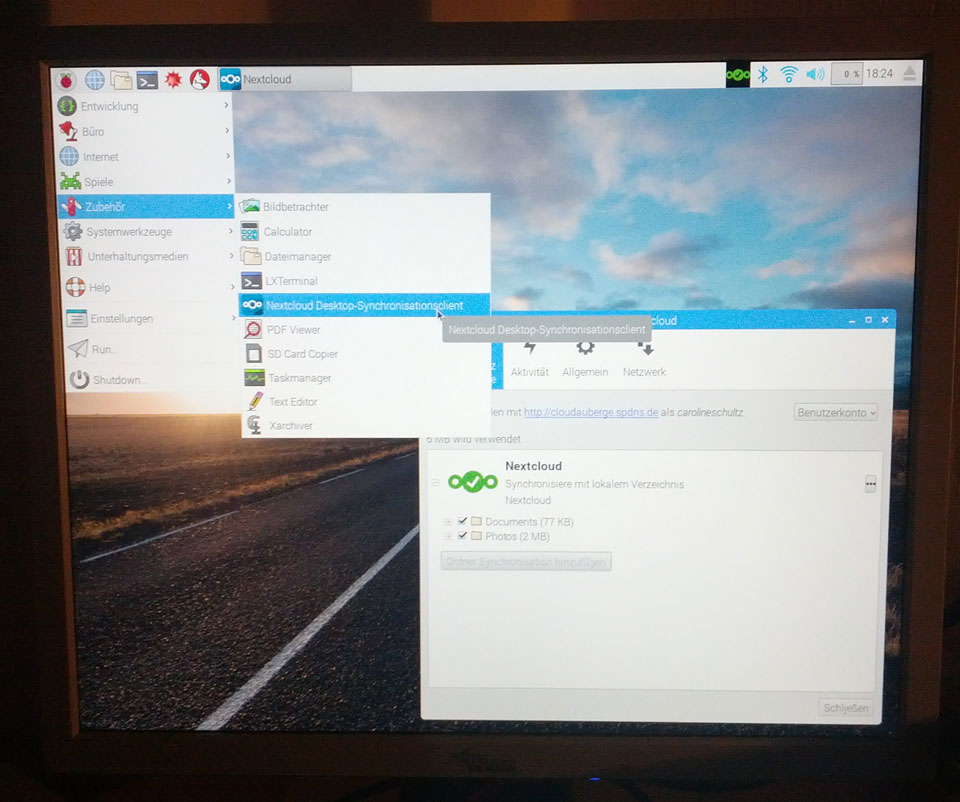
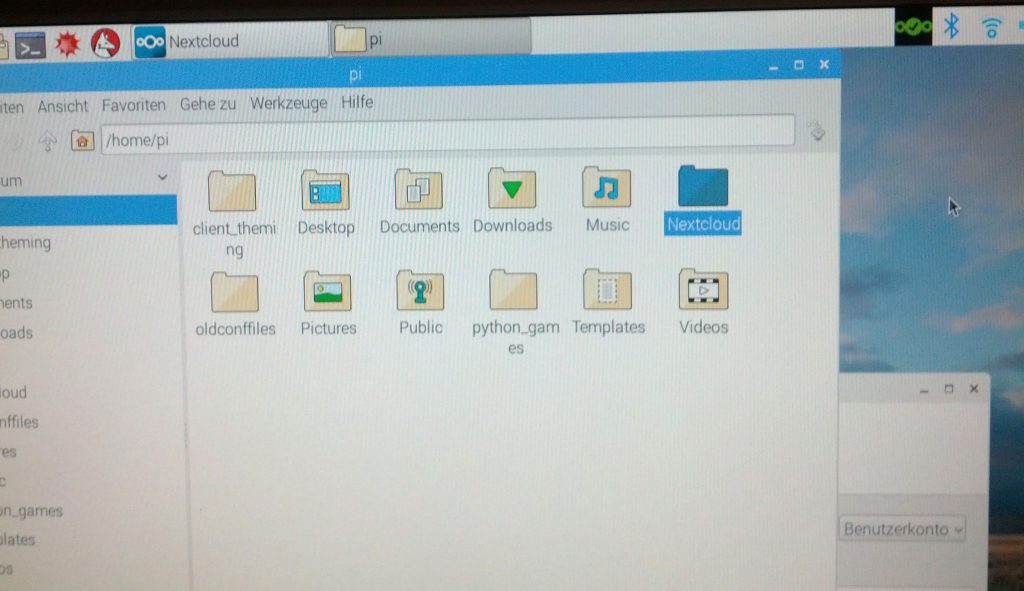
Now start in your terminal the Nextcloud Client. Just type in ‘nextcloud‘ and press the ‘enter‘ key. The Nextcloud window should pop up and you can start connecting your client with the server. From here on the configuration process is pretty self-explanatory. You can see on my (bad) screen photos that the client and the folder ‘Nextcloud‘ syncs automatically with the server. You can adapt the sync process on your needs. I have done it and I am looking forward testing this low-cost Thin Client on a daily life base.

Connect to Server 
Nextcloud Folder 
Synced Files and Folders

17 Comments
Carsten Rieger wrote an intense Installation Guide for the Nextcloud 11 Server on Raspberry Pi 3. Highly recommended if you want to set up a new server:
https://www.c-rieger.de/nextcloud-installation-guide/
how to remove it?
maybe i didnt get it right. I have my Nextcloud Server on the Raspberry Pi 3 and now wanted to add the client to easily manage files on the server (instead of the access through the browser). but I cant even choose the sync folder of my servers directory…
Hi Florien,
Just completed the installation and have a couple of comments. First – fantastic, without this I would not have been able to achieve the result.
Not to detract from my pleasure at the result but: ldconfig appears to require sudo. The icon on the status/task bar appears to be locked to green on black (status/task bar is white). I was hoping that I would be able to use the system headless at this stage that does not appear to be possible as the program converts keystrokes to garbage. I haven’t had a chance to try again – it’s busy syncing 50GB – could take a while as the server and client are both on Raspberry Pi 3’s.
Just woke the client and find that the icon has changed to blue but it has only completed 400MB of the 50GB.
On thinking about the above it is logical that these problems lay with the program not your work in getting it to work on the RPi.
Again, thank you for your great work.
Peter
Hi Peter,
nice that you liked this tutorial!
a) ok I will add the ‘sudo’ command to the ldconfig call
b) As far as I know the color of the nextcloud icon can’t be change. Maybe asked in the Nextcloud Forum if this is correct.
c) I don’t know if running the nextcloud client headless is possible. Maybe it is better to run to nextcloud server, which sync each other. I am pretty sure the people of the nextcloud forum know a good strategy for your problem
d) Nextcloud has sometimes problems with sync huge amount of data. Somewhere, there should be some log files, which makes the debugging easier. Again this is more a nextcloud forum topic. Sorry I can’t help in that context
All the best
Flo
Hi Florian,
Thanks for your response. I am sure the problems I was having were not generated by your procedure. It appears that the sync client on the Raspberry Pi must be set up locally but can subsequently be used headless (I am using XRDP and rdesktop. I have multiple RPis serving multiple purposes and an Acer Atom laptop to run all headless via ssh or XRDP as the occasion requires.
As a matter of interest I think a lot of the problem was caused by
1. Data quantity (I have now preloaded the second RPi using rsync from the original source)
2. Low power (using a ‘bigger’ power supply on the Nextcloud server)
3. Temperature (I’m in Australia and we are coming into winter but the ambient temperature is sitting between 18 and 24 C – during the failed attempts on the large data set the RPi temperature got to 79C – in summer the RPis regularly get to 60C at idle – I’m working on getting fan cooling before next summer).
Thanks again for your tutorial.
Peter
Thanks Peter for your feedback and writing about your problem solving. Very appreciated!
NextCloudPi Server, a ready to use NextCloud image for Raspberry Pi
https://ownyourbits.com/2017/02/13/nextcloud-ready-raspberry-pi-image/
Hi all,
I tried this tuto yesterday on Raspi 2 B+ with debian stretch.
I ran into 2 issues:
1. There was a package missing called “kio” (adds about 90 dependencies or something like that). Just install and thats it.
2. I had to rename the folder “build-linux” to “build-1”, everything else worked as described.
Thanks for that!!
A few tweaks for Raspi 3 model B v1.2 running the latest raspbian “stretch”
I confirm Andy’s comments on stretch with the addition of installing kio-dev to eliminate all package error messages:
sudo apt-get install -y kio-dev
mkdir build-1
cd build-1
Notice the above is a number 1 not letter “l”
Thanks for the fantastic build instructions!!
Dear @Andy and @Murphy,
thank you very much for your feedback! I haven’t checked out “stretch” yet. I am glad to hear that the changes for compilations stays small!
Greetings
I have an issue too. I’m running a RP 3b with raspbian stretch (9.4) but there seems to be quite a few packages missing. I’ve tried the kio-dev but it’s unable to locate the package. I’m wondering if it’s because of the newest version that the packages are missing… I’ve also tried installing the libssl library but to the same result.
It’s a bit frustrating as it seems so close…
Hi All,
I am facing an issue while trying to Install Nextcloud Desktop Client on Raspberry Pi3 with Raspian OS. I have followed the steps till sudo make install. While executing this command I got fatal error like this.
/home/pi/client_theming/client/src/libsync/theme.cpp:34:39: fatal error: /home/pi/client_theming/build-1/../nextcloudtheme/nextcloudtheme.h: No such file or directory
# include INCLUDE_FILE(THEME_INCLUDE)
^
compilation terminated.
src/libsync/CMakeFiles/nextcloudsync.dir/build.make:782: recipe for target ‘src/libsync/CMakeFiles/nextcloudsync.dir/theme.cpp.o’ failed
make[2]: *** [src/libsync/CMakeFiles/nextcloudsync.dir/theme.cpp.o] Error 1
CMakeFiles/Makefile2:242: recipe for target ‘src/libsync/CMakeFiles/nextcloudsync.dir/all’ failed
make[1]: *** [src/libsync/CMakeFiles/nextcloudsync.dir/all] Error 2
Makefile:149: recipe for target ‘all’ failed
make: *** [all] Error 2
Please help me to fix this issue. As I am new to linux and Raspberry Pi, I am stuck with this one.
It’s late answer for Vipin, but the answer is there in the comments:
git clone https://github.com/nextcloud/client_theming.git
cd client_theming
git submodule update –init
cd client
git submodule update –init
cd ..
sudo apt-get install -y kio-dev
mkdir build-1
cd build-1
cmake -D OEM_THEME_DIR=
pwd/../nextcloudtheme ../clientsed -i ‘s/Icon=nextcloud/Icon=Nextcloud/g’ src/gui/nextcloud.desktop
sed -i ‘s/Icon\[\(.*\)\]=nextcloud/Icon\[\1\]=Nextcloud/g’ src/gui/nextcloud.desktop
sudo make
sudo make install
I had the same issue that the make expects the directory ‘build-1’ instead of ‘build-linux’.
But no problem: add the directory ‘build-1’ at the same level where ‘build-linux’ is and restart make. The directory build-1 is never used for make activities, no files are stored inside.
Thanks for this cool tutorial, it worked at the first shot.
Thumbs up !
I have a nextcloudpi running under docker. A 5 min task to load an start the server:
https://ownyourbits.com/2017/11/15/nextcloudpi-dockers-for-x86-and-arm/
I tried on pi 4.
It dosent work
I get following messages:
”
/home/pi/work/nextcloud/client_theming/client/src/libsync/theme.cpp:34:38: fatal error: /home/pi/work/nextcloud/client_theming/build-1/../nextcloudtheme/nextclo udtheme.h: Datei oder Verzeichnis nicht gefunden
# include INCLUDE_FILE(THEME_INCLUDE)
^
compilation terminated.
make[2]: *** [src/libsync/CMakeFiles/nextcloudsync.dir/build.make:453: src/libsy nc/CMakeFiles/nextcloudsync.dir/theme.cpp.o] Fehler 1
make[1]: *** [CMakeFiles/Makefile2:248: src/libsync/CMakeFiles/nextcloudsync.dir /all] Fehler 2
make: *** [Makefile:152: all] Fehler 2
”
would be nice to in you can check it
Raspbian version 09/2019
Franz
Nice Tutorial, it works!
But one thing:
After updating everything, the Key Manager Service (stores the password) does not start reliable before the nextcloud client. As result, sometimes Nextcloud opens and asks for the password. Sometimes the Services starts fast enough and it works. Strange.
Maybe this could be solved with a nextcloud update, but there is no easy function for that. Im compiling the newest version right now, but isnt there an easier way to do this within the normal apt-get update process? Or, if not, an automatic Update Script or something like that?
Hi there, thanks for the tutorial. I corrupted my Jessie installation and upgraded to to Buster and couldn’t get the nextcloud client build to work.
I saw elsewhere on the interwebs that the owncloud client works with nextcloud and this is easier to install: sudo apt-get install owncloud-client
Have tried it and it works!